Saturday, November 20, 2010

Memories from Hanoi & Halong Bay

It's been almost a month since I came back from the Hanoi trip with Gette & Maggie. Making the fresh spring rolls from the rice paper I brought back from Hanoi recently, got me reminiscing about my trip. It was a fun weekend away, getting stuffed and inspired, with lots of sharing and laughs ... (not to mention, braving the honking street traffic)

Friday, November 12, 2010

Heart You Long Time

Audrey & Fred had been dating for 10 years! Finally, they tied the knot last Tuesday ... Congratulations to the two greatest people I know ;)

Previously, I blogged about the pink veil I made for her hen's night here. Now, here's the gorgeous bride wearing it with a pink tutu which I made later. (photo by Jessie Wong Yii Ling)

What's In Your Bag?

Finally, after much procrastinating, I submitted my entry for "What's in your bag?" competition @ Kinokuniya Singapore and Malaysia.

Had lotsa fun with friends putting the shoot together. Thanks, Lili, WanHow & Celine ;)

This is my entry ...
Recognise some of the hand-crafted goodness there??


Friday, November 5, 2010

Rubber Stamping Fun

Recently, I was toying with the thought of getting some rubber stamps made for Cloth.withPegs. I even thought about carving it out of erasers or some cork-based material, like this guy from my recent Hanoi trip. (Maggie & Gette got some traditionally hand-carved stamps made for friends.)

Thursday, October 14, 2010

Travel Wallet by BOOKED!

Finished another BOOKED! Travel Wallet from my stock of second-hand books, Eclectic Third Reader
Size (gross): 14.6cm(w) x 22.3cm(h) x 2.6cm(t)
This one is for sale, refer to item on my Etsy shop here. (Contents are for display only)
Update : SOLD!

Sunday, October 10, 2010

Travel Wallet by BOOKED!

Finished another BOOKED! Travel Wallet with similar layout as the first one, and I thought I would illustrate it better with a video.

This one is for sale, refer to item on my Etsy shop here. (Contents are for display only)

Update : SOLD!

Sunday, October 3, 2010

Birthday Breakfast

Caramelised pear on pancakes with maple syrup.
Yes, I made this and it's edible!

Friday, October 1, 2010

BOOKED! : Line Up - Part 1

This is the line-up from yesterday's haul. If anything catches your eye to be BOOKED! to your specifications, let's talk about it in detail through email.

Art, Culture and Environment
Size (gross): 19.3cm(w) x 24.1cm(h) x 2.6cm(t)

Wednesday, September 29, 2010

iPad Case by BOOKED!

This gorgeous leather bound embossed encyclopedia was a lucky find from the local secondhand bookstore. Information in it was kind of out-dated, and it was an 'orphaned' volume.
Since the process was too tedious for me to post it here, I would just show you the end product. I was hyped enough to continually worked on it without too long of a break, so I actually completed it in one day.

Monday, September 27, 2010

Travel Pouch by BOOKED!

I'm proud to announced my new line! I have this fascination with old books, and in particular ... covers of old books. I acquired some interesting old hardcover books. So I am going to 'recover' them for new casings and other purposes.

I will take requests and orders for different custom-made Booked!s. Meanwhile, I will show you that all will be individually handmade, by my first Booked! travel pouch.
This one is for sale, refer to item on my Etsy shop here. (Contents are for display only)

Sunday, September 26, 2010

Flower Power : Rose

I only know that roses have lots of petals. And, based on that I made small petals and stringed them together for this last 'flower' I had to help make.

Each petals with 2 rounded corners were approximately of 9x15cm of pink felt. I repeated for ... erm, I don't remember how many times, but a lot of times. To string them together, I laid them to overlap at the last slit opening.
And, stringed them together with grosgrain ribbon. I didn't managed to get it in pink at the last minute, so I just used cream color.
Now, when I first put it on (before I spread out the petals until my chin), I thought it looked really funny, so I took a photo to show you. And, after all the petals were slowly spread downwards towards my chin ... I still look ridiculous ... and another funny picture to show you.
The leaf was simple. A piece of green felt cut to shape, with 2 bands on the reverse side, and fitted onto the fingers and wrist.

For the others, which I did not document the process, I will just post the pictures of the children wearing it ... when the photos are ready. I am quite sure, they will look better than me modelling it. ;)

Animal Farm : Chicken

Do the chicken dance!!! I was in a hurry and therefore, I didn't manage to document the steps properly ... and so ... I can only describe it now.
Crown : I glued to pieces of red felt together by applying glue to the shape of the top of the crown. Then, I cut it to shape, sewed around the top and stuffed it with small pieces of left over felt. For the headband, I cut 2 small slits, 1 on each piece of the crown, for the headband to slide through. Later, with another piece of elliptical red felt cut out, I stitched shut the crown.

Beak : Randomly, I folded cardboard to this shape and just finished it with yellow felt. Dotted in the 'nostrils' with black marker, and opened 2 small holes to string the elastic band through.

Flower Power : Hibiscus

I literally just made a big red flower, as directly translated from the chinese name for Hibiscus 'ta hung hua' (big red flower). So, I did not make the stigma any hibiscus should have ... lazy & in a rush.

Since all the pieces of red felt we bought were already cut into sizes of approximately 1'x1', I just rounded of 2 corners and added wires offset from those edges, by sewing it in place.
With the 6 slits (for the grosgrain ribbon) I cut across the opposite edge, I stitched 2 slits together lightly to hold the fold, forming sets of 3...
... like so. The previous steps were repeated for the other 4 petals and all 4 were stringed through with red grosgrain ribbon.
Thus, the reverse side and the right side up.

Thursday, September 23, 2010

Animal Farm : Goat

From the previous post on jasmine flower, this one shall be on an animal ... a goat. I initially made a pair of horns from brown cardboard with some paint-shading on it. But, apparently these props for kids have to be hardy enough, as kids can be quite destructive. So not surprisingly, the cardboard horns did not survive the 1st rehearsal.
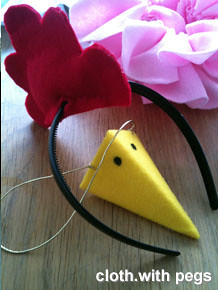
Therefore, I made another one from felt, and am quite sure this will pass the durability test. I also added ears to the second version, thinking that it compliments the horns better. The model with the felt horns is Celine Ling, one of the teachers at WuJiaoJi.
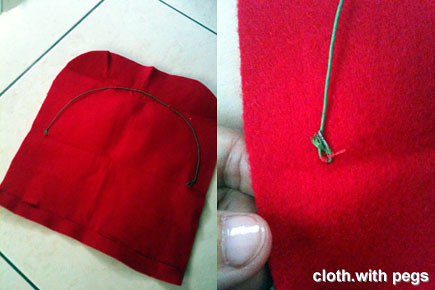
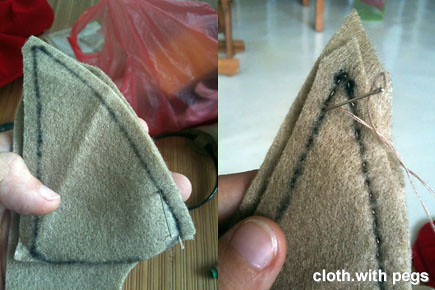
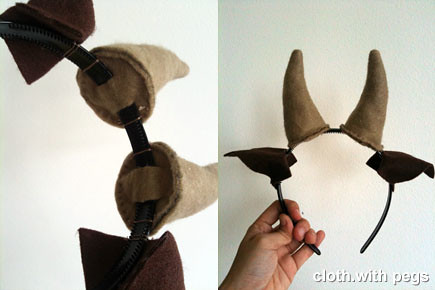
I traced the pattern of the previous flattened cardboard horn (previously of a random sketched pattern) onto 2 pieces of light brown felt . I cut around the traced pattern with some seam allowance and overlaid it over another piece of felt and roughly cut out another 2 pieces. With 4 pieces, I handstitched 2 pieces of brown felt cutouts together, leaving the bottom of the horn-cutouts open. And, repeat for the other 2 pieces of brown felt cutouts.
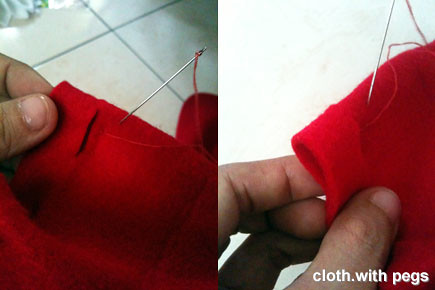
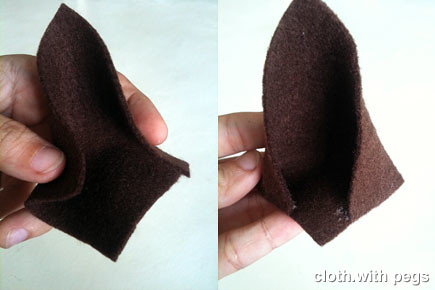
I trimmed off the excess seam allowance, and flipped the horn 'right-side' out.
Used a chopstick to push the horn to it's shape. With all the bits & pieces left over from crafting the other props, I cut them into smaller pieces and stuffed them into the horn to hold it's shape.
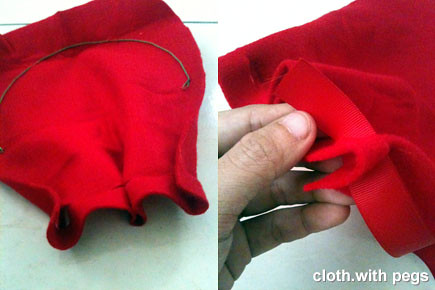
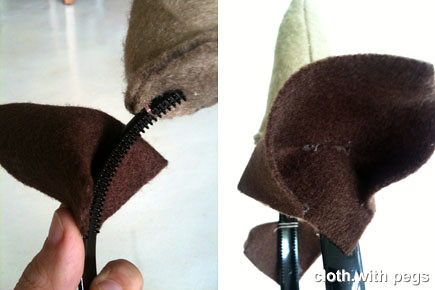
Then, sealing it all in with a round piece, with 2 slits for slipping it into the headband. I glued the horn in place and also handsewn them, to further ensure durability. Repeat, for the other horn.
The ears! I just cut out 2 squares, and folded 2 opposite corners toward another corner. Glued them down like so.
And then, proceed to glue them onto the headband, just under the horn on each side, and also, stitched them in place. To give the horn some shape, I glued the inner fold slightly and stuck it downwards, so the ears will not be pointing upwards, but sideways. Gave it a few tugs here and there to give it some shape too.Done! A view from under the headband ... and the overall view.
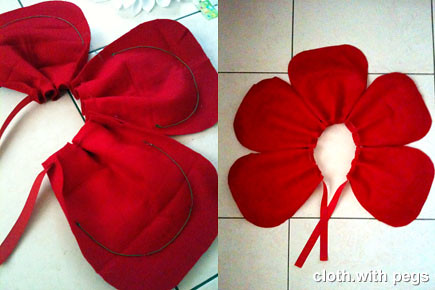
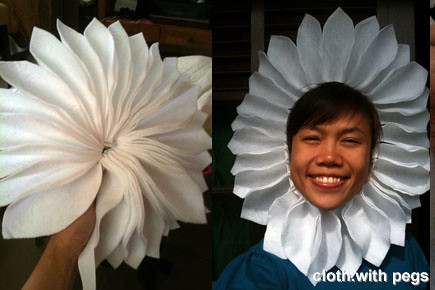
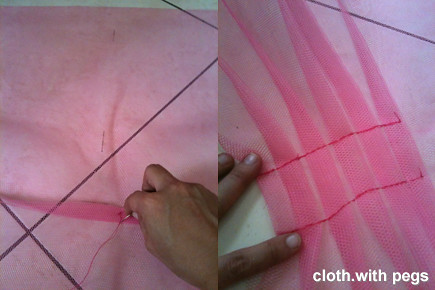
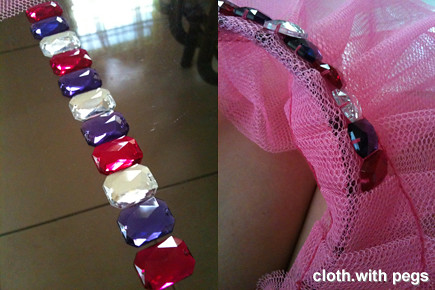
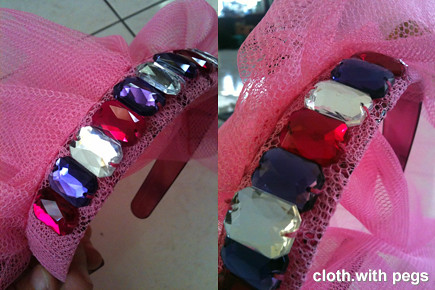
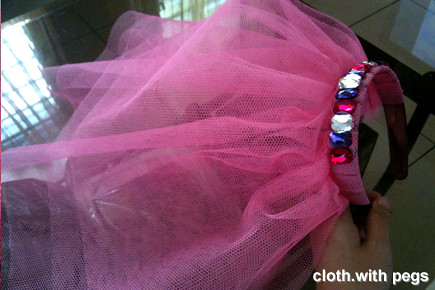
Flower Power : Jasmine

Got busily crafty lately for a cause. Friends at WuJiaoJi asked if I would help them with costumes for their children's play. WuJiaoJi (directly translated at 5 Foot-Way) is also known as Talents and Performing Arts Group is a local cultural group that promotes and educate on mainly chinese cultural heritage. They also teaches young children to perform.
So there'll be a series of crafting posts on 'costumes' for their children's play, starting with flowers.
With so many varieties of jasmines, I decided to go with one with delicate petals, because if we stick to those with 5 petals, it would look bulky and not as delicate. So, we bought lots of white felt and cut out the petals pretty much to 1 random pattern I cut out. With one as a template, we produced a lot more until the flower looks full. On the template, note that I cut 2 slits the width of the grosgrain ribbon I am going to string the petals all together with.
After all the petals are stringed together, I hand stitched the sides of the petals together so the flower will hold it's shape, without the petals falling forward or backwards.
When it's done, it can be easily stored with all the petals folded together. When you put it on, tie the ribbon at the chin ... and slowly fan out the petals towards the sides, and down to cover the ribbon at the chin ... like so ...
Happy flower!

Sunday, September 12, 2010

Don't Be A Chicken! It's Just Hen's Nite!

Yes, it's another pink-colored project! This were the ingredients Belinda and I put together from the craft store this morning at Kenyalang Park. The hairband was from the jewellery and accessories store.
This went back 4 years ago (2006), when I made a veil for my sister's hen's night. She married the guy with the bib which I made too. Sarah's her best friend/bridesmaid.
And now, it's Belinda's sister's turn to get hitched. So we are throwing her a hen's night. I started working on the veil, when I got home with the materials. Cut 2 pieces of 30"x30" pink tulle and lay them parallel with 2" distance from the edges. This will define the layers of the veil from the back
.
Then from the middle, I pleated the tulle in by strips of 1" and used pins to hold them in place when I sewed them down. I did 2lines of backstitching at the distance of double the headband thickness (you'll see why later).
And I repeated the same on the other half. When you refer to the picture below, you'll see that the tulle are folded over the headband where the 2 lines of backstitching will meet up. I'll use this as a guide to secure the tulle onto the headband.
Garnish. Belinda selected wonderful colored (fake) gemstones. I lined them out first before deciding on the best composition, and then sewing them onto the tulle. After that, I returned the tulle, with the gemstones all sewn on, to the headband. Folded it over and hand-stitched the tulle to the headband following the backstitching.
And ... voila! Everything secured in place without glue! So that parts can be recycled for other purposes/projects, if need to, eventually.
Are you ready, Audrey? ;)

Sunday, August 8, 2010

101 Things

I first found the "101 Things I Learned in Architecture School" by Matthew Frederick one of the most inspirational mini-textbook around. Especially after working for so long, one tends to get jaded by the whole paper-work aspect of architecture and lose track of the beauty of architecture. Going back to school (this time tutoring), is a refreshing change. And browsing through this book filled with 'things I learned', I realised that these are still very eminent it is in my architectural practice these days ... brought back fond memories of school and prized assignment & achievements.
And now, Matthew Frederick collaborated with other professionals to come up with a series of 101 Things I Learned.

Today, I added 101 Things I Learn in Fashion School to my collection, although I was never properly schooled in that aspect, but if it's anything like the first one I have, I am sure I will enjoy it ... ;)


Saturday, August 7, 2010

Pegs and Something Pink

And the dinner is finally a wrapped! A great big pat on the back for Grace Yong for pulling this together. Although not everyone was there, but in attendance where near to 1,000 alumni ranging from graduating year of 1949 to 2010!

It is REALLY something pink! Just look at the photo from a dear friend and an amazing photographer, Andy Kho.
In the end I just didn't continue working on the 'doily' and I had to come up with a quick solution last minute. I bought some leather straps in pink while out with Gette, 2 days before the reunion dinner.
So, I twisted it into the Breast Cancer Awareness ribbon like at the back of the dinner ticket ... and voila, "Pegs and Something Pink" clipped to my knitwear.
Here's another wonderful picture by Andy, with Wendy. I did end up wearing a cheongsam top in pink underneath my knit. I do think this is a subtler approach than the doily on the head. ;)


Saturday, June 26, 2010

Something Pink

There will be a reunion dinner for my school in July, and the theme is Something Pink. Although I am just gonna go in a Breast Cancer Awareness Pink Ribbon pin, I've decided to experiment with something pink, anyways...

Found these wonderful lace trimmings and thought I would test something out on it. I wanted to do a headpiece with some tulle and attached it to a headband. But at the moment, I got something that looks like a doily. I loved it anyways. I loved that it looked vintage.

Here's what I did, I stringed some beads together with the lace, intending for it to cluster together at the end and form a 'centre'.
And I continued for another 10 pearl beads...
At this point, I cut off the extra lace trimming and looped it back to join with 1st bead, and tied it together. And I also stitched the ends of the lace trimming together.
There we go, after the ends had been joined.
Since I thought it looked too constricted, I cut the lace up at the nooks to further define the 'petals'.
I tried to enhance it sideways, so it doesn't look so rounded, by adding extra petals to 2 sides, on opposite ends.
And stitched it on...
Guess that's progress until now, until I decide to work on it some more ... ;)

Friday, June 25, 2010

On The Run On My Own

If you had noticed in my previous blog entries about preparations for 'going away', you can now piece it together with my long hiatus ...

My jeans bag and I were inseparable. Everywhere I went, I got a lot of nods for the upcycled bag ... and it's quite a conversation starter. Gave the hat to Charlotte who is a real gem! Brought some other Borneo crafts for friends too.Trace my adventures here ... ;)