Showing posts with label Costume. Show all posts

Saturday, September 17, 2011

I Finally Spat It Out

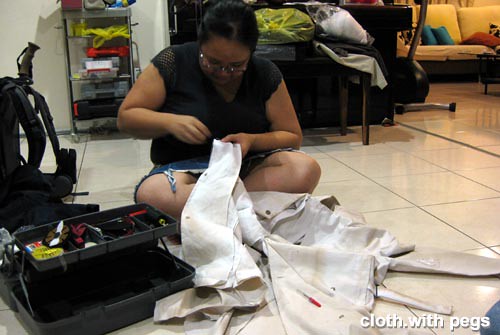
I spent today's public holiday at home tidying up my crafting stash and found more stuff I need to decide what to to with them.  I stumble on some of my unfinished steampunk ensemble; i.e. the one sided spats (as mentioned in this blog entry).  So I decided to push myself to complete these spats...
... just to realised that I lost the pattern (pfft!), so I decided to start from scratch. 

Wednesday, September 14, 2011

Tribal Princess

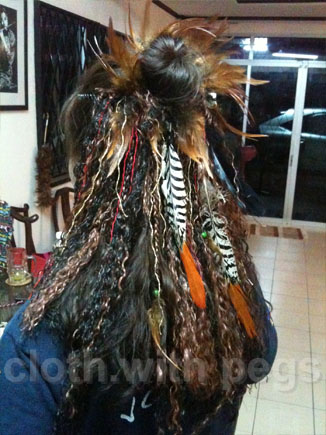
I enjoy doing costumes and what more to help a friend.  Irene was to make her own hair accessories for her tribal belly dance costume.  And, I quickly jumped at the chance to help put this together.
Irene showed me some pictures of how her hair piece was supposed to look like.  And with those crafting stuff she bought, we were soon on the way ...

Friday, November 12, 2010

Heart You Long Time

Audrey & Fred had been dating for 10 years! Finally, they tied the knot last Tuesday ... Congratulations to the two greatest people I know ;)

Previously, I blogged about the pink veil I made for her hen's night here. Now, here's the gorgeous bride wearing it with a pink tutu which I made later. (photo by Jessie Wong Yii Ling)

Sunday, September 26, 2010

Flower Power : Rose

I only know that roses have lots of petals. And, based on that I made small petals and stringed them together for this last 'flower' I had to help make.

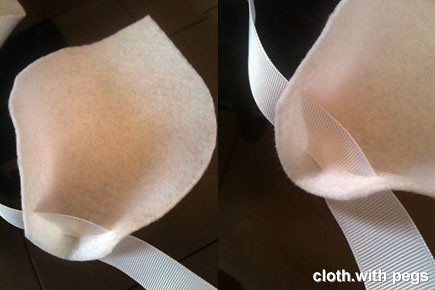
Each petals with 2 rounded corners were approximately of 9x15cm of pink felt. I repeated for ... erm, I don't remember how many times, but a lot of times. To string them together, I laid them to overlap at the last slit opening.
And, stringed them together with grosgrain ribbon. I didn't managed to get it in pink at the last minute, so I just used cream color.
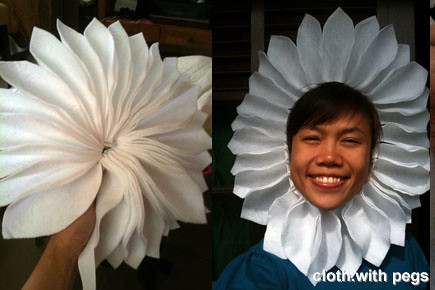
Now, when I first put it on (before I spread out the petals until my chin), I thought it looked really funny, so I took a photo to show you. And, after all the petals were slowly spread downwards towards my chin ... I still look ridiculous ... and another funny picture to show you.
The leaf was simple. A piece of green felt cut to shape, with 2 bands on the reverse side, and fitted onto the fingers and wrist.

For the others, which I did not document the process, I will just post the pictures of the children wearing it ... when the photos are ready. I am quite sure, they will look better than me modelling it. ;)

Flower Power : Hibiscus

I literally just made a big red flower, as directly translated from the chinese name for Hibiscus 'ta hung hua' (big red flower). So, I did not make the stigma any hibiscus should have ... lazy & in a rush.

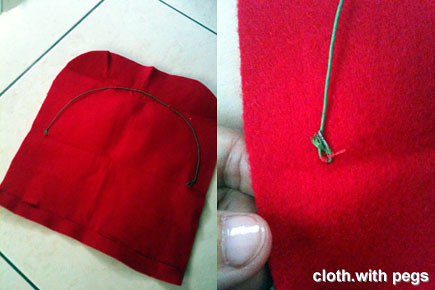
Since all the pieces of red felt we bought were already cut into sizes of approximately 1'x1', I just rounded of 2 corners and added wires offset from those edges, by sewing it in place.
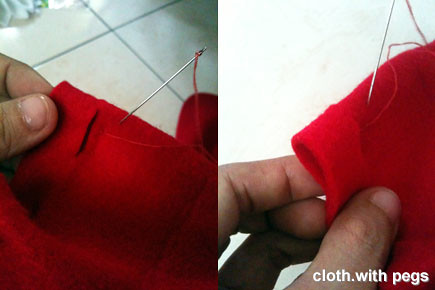
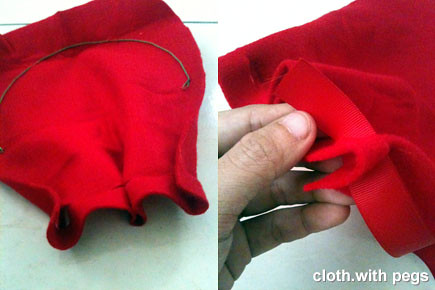
With the 6 slits (for the grosgrain ribbon) I cut across the opposite edge, I stitched 2 slits together lightly to hold the fold, forming sets of 3...
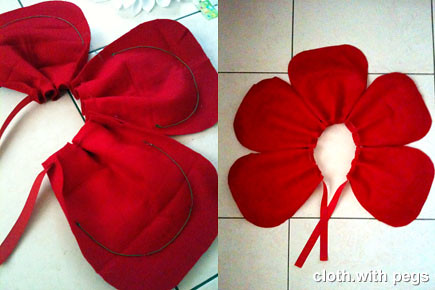
... like so. The previous steps were repeated for the other 4 petals and all 4 were stringed through with red grosgrain ribbon.
Thus, the reverse side and the right side up.

Thursday, September 23, 2010

Animal Farm : Goat

From the previous post on jasmine flower, this one shall be on an animal ... a goat. I initially made a pair of horns from brown cardboard with some paint-shading on it. But, apparently these props for kids have to be hardy enough, as kids can be quite destructive. So not surprisingly, the cardboard horns did not survive the 1st rehearsal.
Therefore, I made another one from felt, and am quite sure this will pass the durability test. I also added ears to the second version, thinking that it compliments the horns better. The model with the felt horns is Celine Ling, one of the teachers at WuJiaoJi.
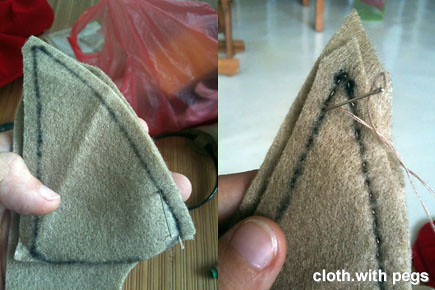
I traced the pattern of the previous flattened cardboard horn (previously of a random sketched pattern) onto 2 pieces of light brown felt . I cut around the traced pattern with some seam allowance and overlaid it over another piece of felt and roughly cut out another 2 pieces. With 4 pieces, I handstitched 2 pieces of brown felt cutouts together, leaving the bottom of the horn-cutouts open. And, repeat for the other 2 pieces of brown felt cutouts.
I trimmed off the excess seam allowance, and flipped the horn 'right-side' out.
Used a chopstick to push the horn to it's shape. With all the bits & pieces left over from crafting the other props, I cut them into smaller pieces and stuffed them into the horn to hold it's shape.
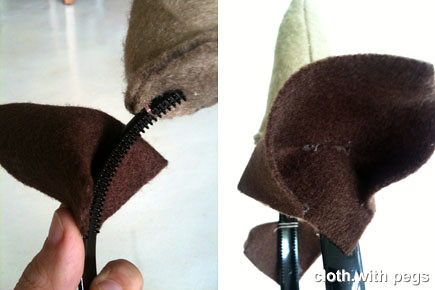
Then, sealing it all in with a round piece, with 2 slits for slipping it into the headband. I glued the horn in place and also handsewn them, to further ensure durability. Repeat, for the other horn.
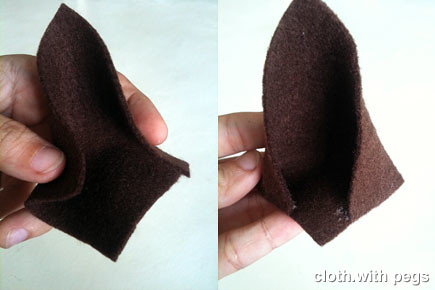
The ears! I just cut out 2 squares, and folded 2 opposite corners toward another corner. Glued them down like so.
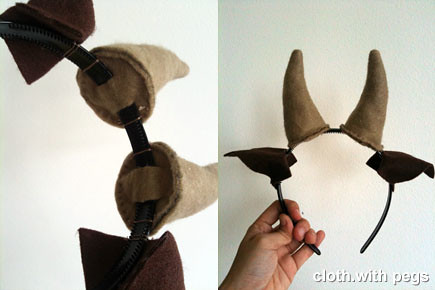
And then, proceed to glue them onto the headband, just under the horn on each side, and also, stitched them in place. To give the horn some shape, I glued the inner fold slightly and stuck it downwards, so the ears will not be pointing upwards, but sideways. Gave it a few tugs here and there to give it some shape too.Done! A view from under the headband ... and the overall view.

Flower Power : Jasmine

Got busily crafty lately for a cause. Friends at WuJiaoJi asked if I would help them with costumes for their children's play. WuJiaoJi (directly translated at 5 Foot-Way) is also known as Talents and Performing Arts Group is a local cultural group that promotes and educate on mainly chinese cultural heritage. They also teaches young children to perform.
So there'll be a series of crafting posts on 'costumes' for their children's play, starting with flowers.
With so many varieties of jasmines, I decided to go with one with delicate petals, because if we stick to those with 5 petals, it would look bulky and not as delicate. So, we bought lots of white felt and cut out the petals pretty much to 1 random pattern I cut out. With one as a template, we produced a lot more until the flower looks full. On the template, note that I cut 2 slits the width of the grosgrain ribbon I am going to string the petals all together with.
After all the petals are stringed together, I hand stitched the sides of the petals together so the flower will hold it's shape, without the petals falling forward or backwards.
When it's done, it can be easily stored with all the petals folded together. When you put it on, tie the ribbon at the chin ... and slowly fan out the petals towards the sides, and down to cover the ribbon at the chin ... like so ...
Happy flower!

Sunday, May 31, 2009

Beijing

Just wanna share some pictures from my recent trip to Beijing. One of the highlights from this trip was the National Theatre of China in Beijing, design by French architect Paul Andreu.

(oooo, those costumes and miniature set design models!!!)
some more photos here:

19th May 2009
arrived in Beijing Terminal 2
dimsum breakfast
Tiananmen Square
Beijing Opera House
Forbidden City
Pu Er Tea outlet
check-in to Taly Plaza Hotel
dinner

20th May 2009
BIAD
Planning Exhibition Hall
Peking Duck lunch
Opposite House (hotel) by Kengo Kuma
The Village (shopping centre)
(eat McD mapo pork burger!)

21st May 2009
Temple of Heaven
SOHO Jianwai
SOHO Shangdu
CCTV
Linked Hybrid
798
Tenggili Tala dinner

22nd May 2009
Summer Palace
Hotel 61 Cote Cour
Hotel Kapok
WangFuJing
Szechuan dinner
JiuBaJie (Bar Street)

23rd May 2009
Great Wall
Commune at the Great Wall
lunch near Olympic park
jade outlet
Qianmen Jianguo Hotel/Liyuan Theatre
Qianmen Jie

24th May 2009
rickshaw ride in Hutong
Water Cube (Olympic Aquatic Centre)
Bird's Nest (Olympic Stadium)
acrobatic performance
dinner
nite scene of Water Cube & Bird's Nest
(supper near hotel)

25th May 2009
and a couple of pics from our last day there at the airport

Wednesday, April 8, 2009

Mysterious

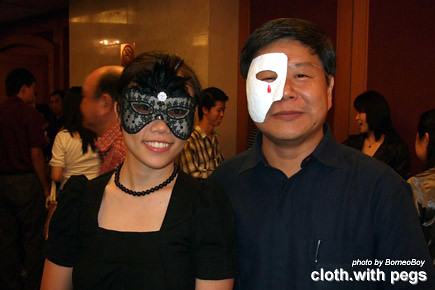
Borneo Boy asked me to make him a mask for our PAMSC BTS Gala Dinner.

What are the chances one would get to pressed aluminum foil up on the face of the president of an architect's association at a charity auction dinner with lots of who's-who?

Sure! Why not ...

At the Habitat for Humanity charity dinner, I traced and contoured the profile of CW's face with an aluminum foil & marker pen that I brought from home. Forgot to get someone to take a photo of me doing it in the middle of the dinner. But this is the photo of the aluminum foil (after) on the the dining table; and after I applied on the strips of masking tape.To hold CW's mask in place, I tied in the transparent rubber band I used for beading, on both sides of the mask. And here's the both of us. CW sprayed finished the mask with white and added the tear himself after I handed him the mask. That's some DIY effort there!Now, either my nose is not in the middle of my face, or the mask is not centered.

Tuesday, March 3, 2009

Masq-uerade

[Fear not! This has nothing to do with preventing aliens from reading my mind. Although the first picture may remind you of a scene from "The Signs"]

Recently, I saw that a dinner I’ll be attending is themed as “Mysterious”, and so, I made myself a masquerade mask. I have always been fascinated with masquerade masks, but they tend to get quite pricey and also, not so available locally.

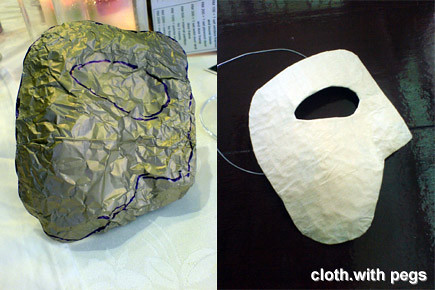
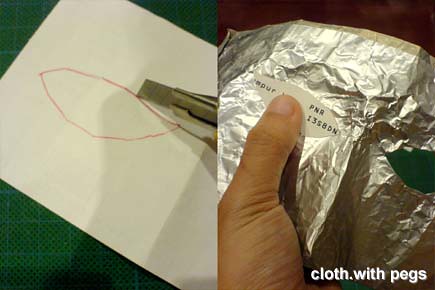
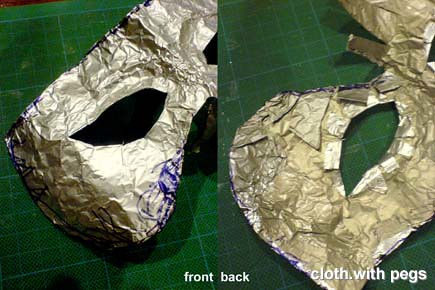
Like always, I put together a couple of crafting tutorials and improvised them for making this mask. For moulding the shape of the mask, I used 3 layers of aluminium foil (those you use in the kitchen) and pressed it up against my face. Making sure I get those brows, eye sockets, nose & cheekbones.Then, I cut into the eye sockets in flaps and folded it to the back. I tried to check in the mirror once in a while until I get the desired eye opening, for one eye first.Close-up of the opening.
To get the (close to) exact opening size, I traced the first opening, cut it out, flipped it over (mirrored) to the other side and traced it into place. And, repeat the previous process for the eye opening.
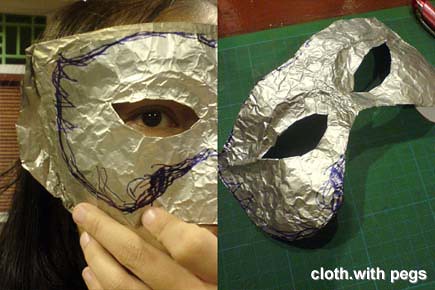
After that, looking through both openings, I sketched the outline of the mask, by pressing it up against my face and in front of the mirror. Then, I folded the extra aluminium foil along the edges, to the back. This should also make the mask have a stronger and more defined edge.
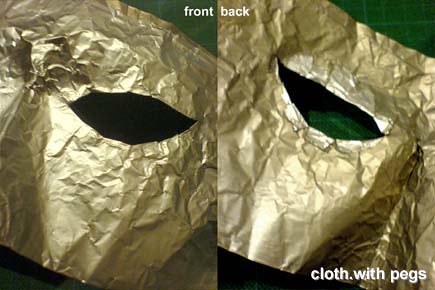
I continued to mould it for a more 3D effect. Here’s the front & the back of it.
I chose to add another base to the aluminium foil, by wrapping it up in strips of masking tape. This also holds those loose aluminium flaps in place before applying the paper mache, using toilet paper & craft glue.
Application of craft glue and layers of toilet paper strips later, I finished it off with a final coat of water with diluted craft glue, and left it to dry.
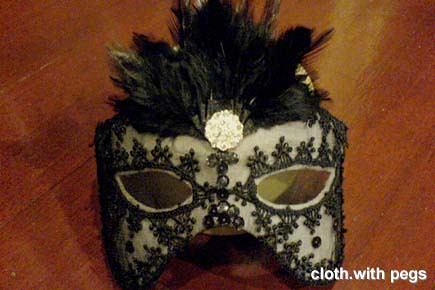
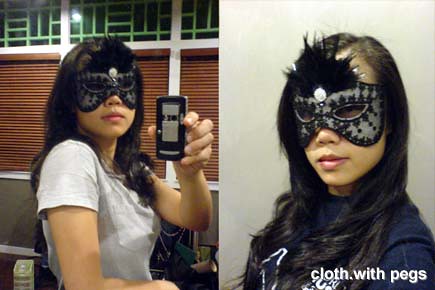
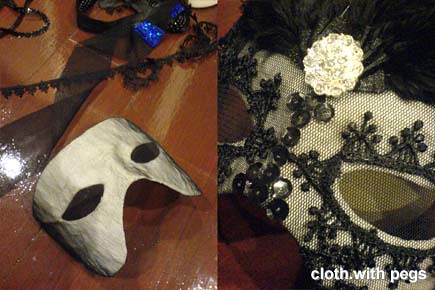
Add ImageOn the dried mask, I glue on a layer of black tulle (salvaged from other sewing projects). I chose to not cut openings at the eyes, since there was visibility through the tulle. Since most of the garnish I chose was already in black, I also did not paint the paper mache finish, so I could get a bit of contrast with the tulle lined on it. Then I garnished it further with black sequins, black feathers, black lace trims and an elaborate ‘diamond’ button.
... and voila!

At this moment, the mask kind of grabs my face at the forehead and the sides. I may add ribbons to tie it to the back of my head, or a stick to the side at a later stage.

Friday, January 23, 2009

Capt Cyke : Tweed Vest with Brass Details

This is a vest I made for last Halloween, when I went as Capt Cyke. I have been meaning to write about it during Halloween last year, and obviously it didn't happen until now.

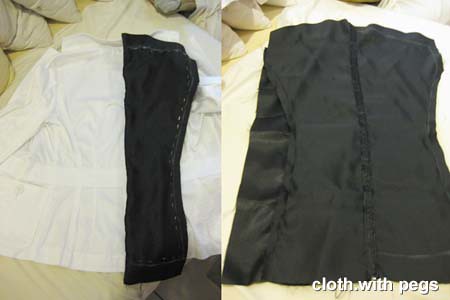
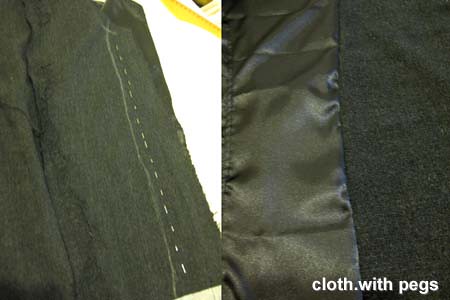
It was hacked from a long dress I bought from the Salvation Army thrift store. It was some kind of tweed/wool material. Since I need the overlap at the front of my vest, I decided to use the bottom of the dress which was wider. I drew a line across, allowing the length of it to suit my torso.
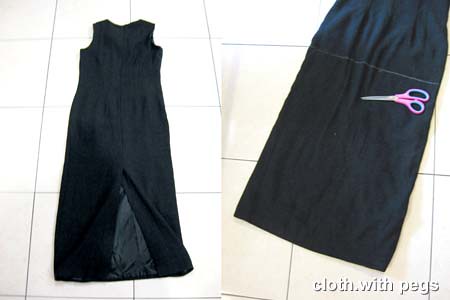
After I cut along the line, I picked the bottom seam and the seam at the back split of the dress apart, to reveal it as a long strip. With the whole length of it, and roughly sketched the pattern right on top of it, and cut. I decided that the back should have a different kind of fabric. I tried to line up the other existing seams to my bustline (top to bottom). It was a flat front panel, which I later added darting for contouring it into the perfect fit.
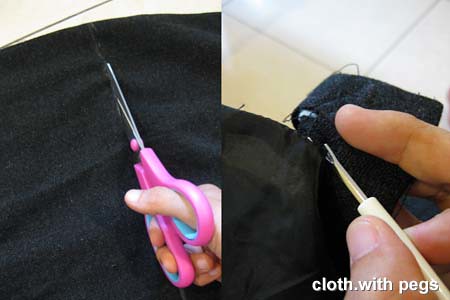
For the back panel, I took out the leftover satin fabric that I saved from my Roman costume.
Again, without an existing pattern, I took out one of my jacket, and traced the back pattern off of it, and right onto the satin fabric. It was about 4 pieces, all luckily within the size of the leftover fabric.Then, I joined the front panels and the back piece together. From my side seams, this is the kind of fabric effect I intended for, in the same color, yet in different texture.At this point, I tried it on, inside out, and pinned up the side seams until I got my desired fitting, which include darting at the bust. After that, I sewed it all together and finished hemming all the ends.
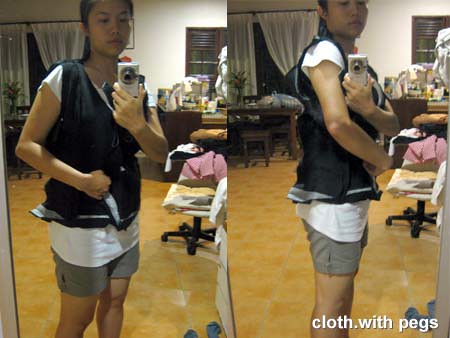
The end result, after I added a bit more details at the front and at the back. And of course, the collar in tweed material.
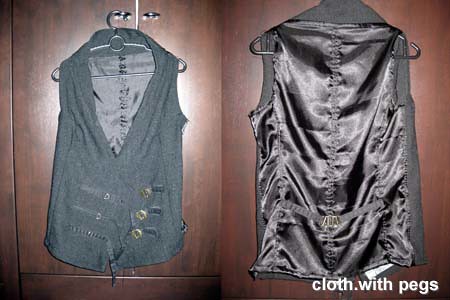
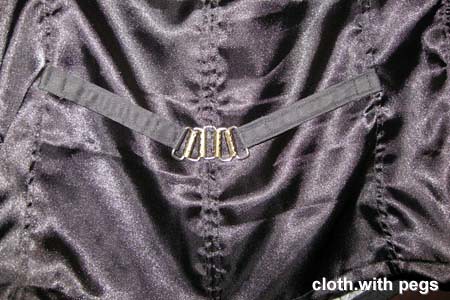
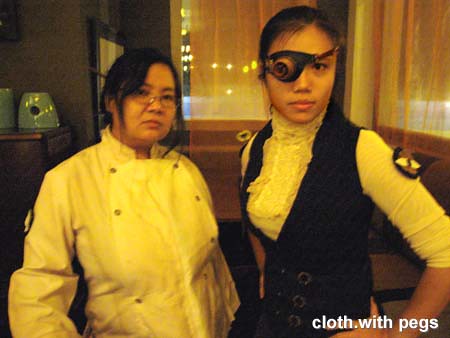
For the front, I used brass buckles, D-rings and fabric straps, which were made from leftover fabrics from my wrap pants project. Again, same color, different texture. For the position and setting out of the straps and buckles, I had to put on the vest and sketch it on in front of a mirror, until I was satisfied. (note the white chalk markings behind the buckles)And for the back, I found some really interesting brass chain (I am not quite sure what it is exactly used for), and attached it to the back with the same kind of straps I used for the buckles in front. Due to the weight of brass chain, I lightly sewed it onto the middle seam so it would hold its place.On Halloween 2008, I wore it over my blouse which had a cravet-like detail. Spunked it up with my mecha-monocle, badge-of-office, pin-stripe pants and my old boots. (Since I only had time to make one side of a spats, so I didn't end up wearing it)

This is C J Morta & Capt Cyke.
Wednesday, November 26, 2008

Capt Cyke : Badge of Office

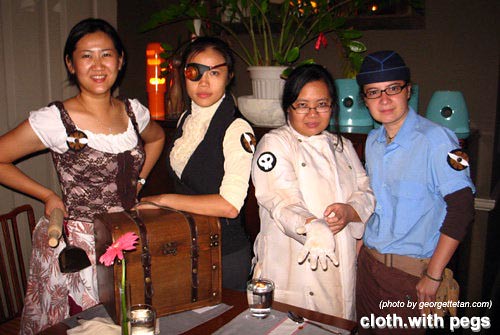
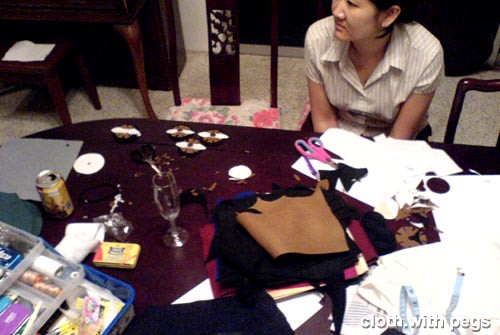
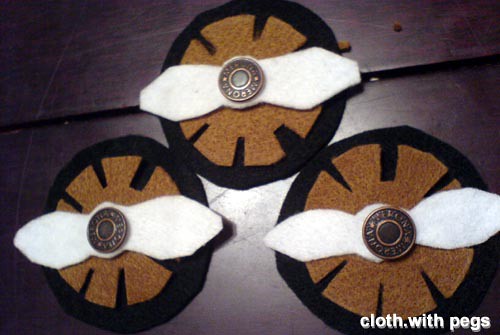
As the crew of an airship, Georgette made us Badge of Office! This post is a tribute to the badges she (and some of us) made, since she hadn't posted anything about it. Below is G adding the final touches at my place.
Some of them were done at Maggie's, with Aline.
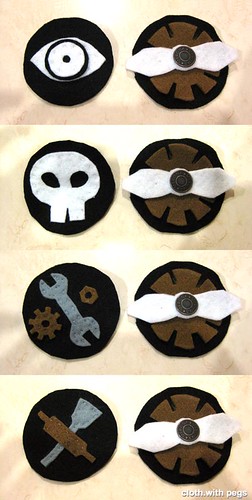
Badges of The Argos.
top-bottom: The Captain, The Doctor, The Machinist & The CookI thought they were absolutely amazing, so I decided to wear it to work today! and when asked, I just said "My friend made it for me" :)