Showing posts with label Family. Show all posts

Thursday, August 9, 2012

Hammocks for Hubs

Hubby said he was going camping and needed my help with sewing some new hammocks.  I was more than excited.  It had been a long time since I actually sewn new projects, other than just repairing clothing or bags.  
He told me how he wanted it done.  Showed me some of the other stuffs they had and asked me if I could do something similar.  Roughly, this was what we did with the ripstop nylon fabric he bought.  We cut it up into 2 panels of approximately 8'(L)x5'(W).  At both ends, I had to allow enough sleeve room for them to hang up the hammock.  Hubs thought about having this pouch sewn to the sides for keeping the hammock and also as a side pocket for when the hammock was being used.

Wednesday, February 1, 2012

Nice Bottom for CNY

I've seen Chinese Lunar New Year lanterns being decorated from below with spring blossoms.  I figured that since it is not really difficult to be put together, I can save some money for CNY snacks~!!!

Friday, November 12, 2010

Heart You Long Time

Audrey & Fred had been dating for 10 years! Finally, they tied the knot last Tuesday ... Congratulations to the two greatest people I know ;)

Previously, I blogged about the pink veil I made for her hen's night here. Now, here's the gorgeous bride wearing it with a pink tutu which I made later. (photo by Jessie Wong Yii Ling)

Sunday, September 12, 2010

Don't Be A Chicken! It's Just Hen's Nite!

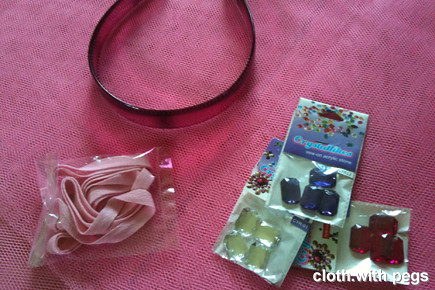
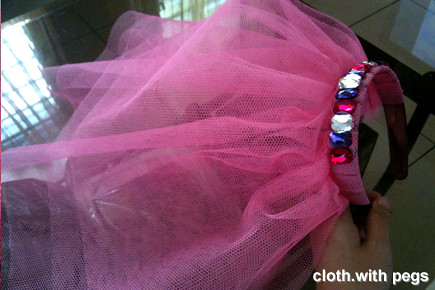
Yes, it's another pink-colored project! This were the ingredients Belinda and I put together from the craft store this morning at Kenyalang Park. The hairband was from the jewellery and accessories store.
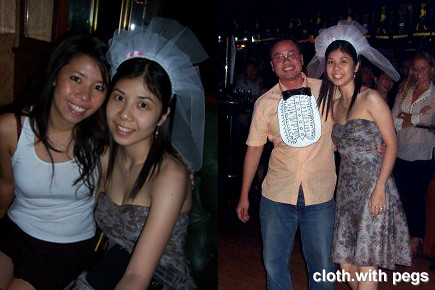
This went back 4 years ago (2006), when I made a veil for my sister's hen's night. She married the guy with the bib which I made too. Sarah's her best friend/bridesmaid.
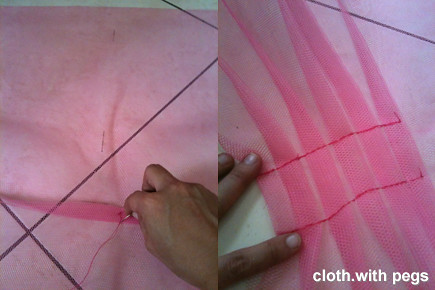
And now, it's Belinda's sister's turn to get hitched. So we are throwing her a hen's night. I started working on the veil, when I got home with the materials. Cut 2 pieces of 30"x30" pink tulle and lay them parallel with 2" distance from the edges. This will define the layers of the veil from the back
.
Then from the middle, I pleated the tulle in by strips of 1" and used pins to hold them in place when I sewed them down. I did 2lines of backstitching at the distance of double the headband thickness (you'll see why later).
And I repeated the same on the other half. When you refer to the picture below, you'll see that the tulle are folded over the headband where the 2 lines of backstitching will meet up. I'll use this as a guide to secure the tulle onto the headband.
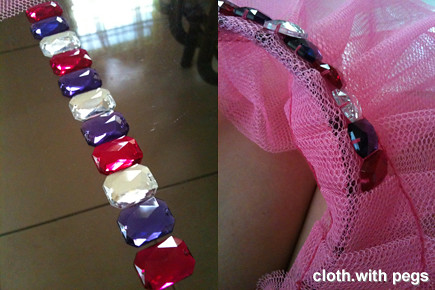
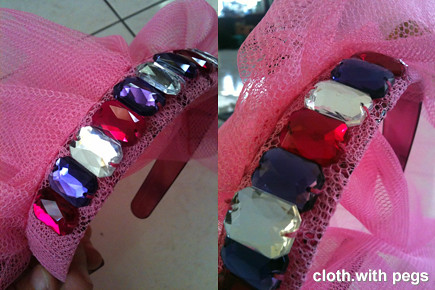
Garnish. Belinda selected wonderful colored (fake) gemstones. I lined them out first before deciding on the best composition, and then sewing them onto the tulle. After that, I returned the tulle, with the gemstones all sewn on, to the headband. Folded it over and hand-stitched the tulle to the headband following the backstitching.
And ... voila! Everything secured in place without glue! So that parts can be recycled for other purposes/projects, if need to, eventually.
Are you ready, Audrey? ;)

Tuesday, February 9, 2010

Couch Make-over

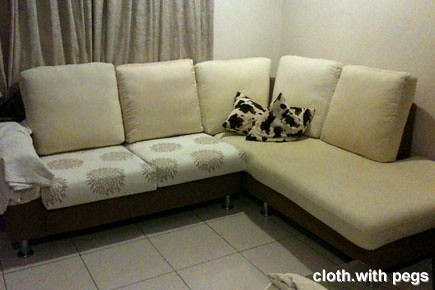
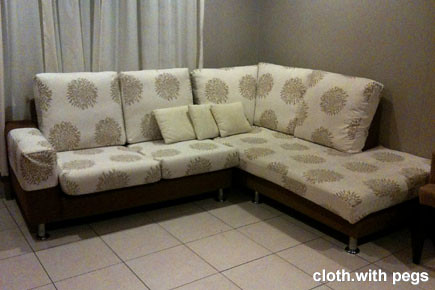
The couch at home is in dire need of a new outfit. The one it came in 5-6 years ago is looking dowdy and blotchy from food stains. So last December, we went fabric hunting and ended up choosing this patterned micro-fibre fabric. Some commented that the patterns looked like chrysanthemum flowers. Bought 10meters of it (60" width).

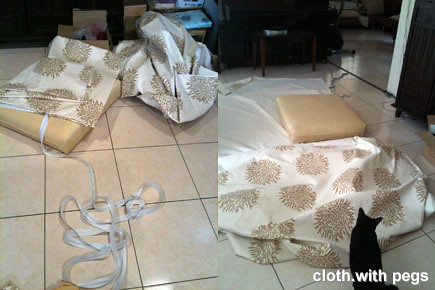
Spread it all out on the floor (biggest workspace ever) and started measuring away from the existing cushions.
Recorded the measurements, in the only way I know how to. Categorised & coded the pieces. And started sewing. It was pretty straight forward I must say, for most of the pieces. Panel with zipper, and the rest of the panels. I was so glad that the fabric didn't stretch too much. So it pretty much held its measurements.

Voila, the 1st new cushion cover ...
... and another one of the same measurements.
Next day, 3 more of the same measurements.
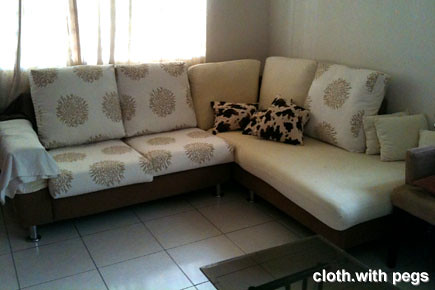
Over the next couple of days, some more ... and finally ... finished!!!
Mmmm ... I love 'swimming' on the finished couch ... smooth micro-fibre surface .... bliss!

Thursday, December 18, 2008

Miniature Dinner Gown

ZuAn is a 12-year-old crafty little girl. Crafty meaning she knits, she makes bears, she knits bears, she makes dolls, she makes dresses for her dolls and bears, she sews and she draws extremely well too.

The creative genes are most likely courtesy of her parents as artists. Her mom told me that she encourages ZuAn to keep all her sketches in a sketch book instead of loose pieces of paper. That sketch book was exhibited during her mom's solo art exhibition in Singapore, and there was a lot of demand for that sketch book. It was about an on-going amazing adventure of a little girl with Superpig and friends, and its all from fragments of her imagination. I'm truly inspired by her.
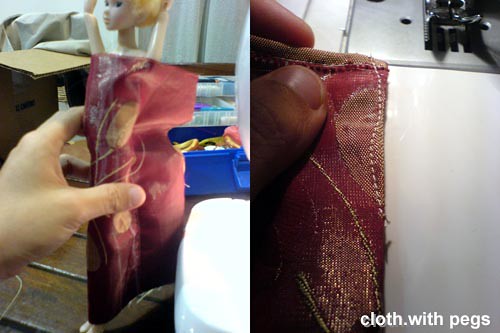
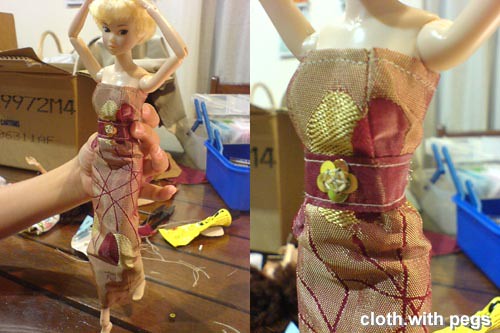
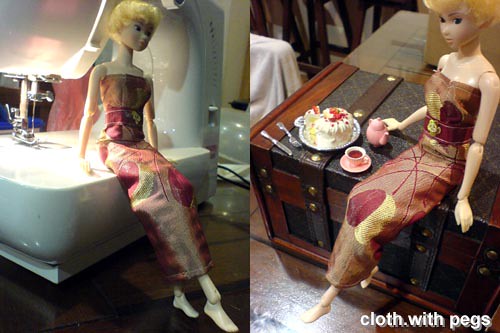
Recently she visited us with her horde of a family. While the other kids are playing computer games, she was knitting or sketching away. She jokingly said that she'd rather stick to handicraft because she is 'technologically challenged'. So I accompanied her in making some dresses for both of her Momoko dolls. She collected my mother-in-laws fabric scraps, and one of it was a very nice magenta colored curtain fabric with gold weaves. So we decided to make a simple tube dress, which I worked on from inside out. I darted it to give it contours too.At the back, while ensuring that Momoko can slip in and out of the dress, we decided to give her a velcro fixing. After all that, we decided that the dress still didn't give her enough of a waistline, so I made Momoko an obi, also fastened with velcro at the back. I secured the obi to the dress with sequins, shaping it like a sakura.Here's Momoko modelling her new dress at my sewing machine, and with some of my Re-ment collection.I later added a 'gold' necklace and hairband to Momoko from my beading wires.

This is a not my first miniature, but definitely a miniature first with my sewing machine. It made my already stubby fingers feel like big clumsy sausages.