Showing posts with label Collaboration Work. Show all posts

Thursday, August 9, 2012

Hammocks for Hubs

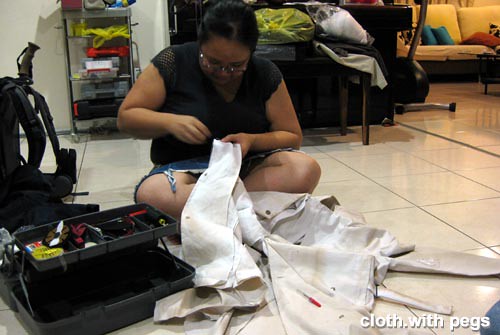
Hubby said he was going camping and needed my help with sewing some new hammocks.  I was more than excited.  It had been a long time since I actually sewn new projects, other than just repairing clothing or bags.  
He told me how he wanted it done.  Showed me some of the other stuffs they had and asked me if I could do something similar.  Roughly, this was what we did with the ripstop nylon fabric he bought.  We cut it up into 2 panels of approximately 8'(L)x5'(W).  At both ends, I had to allow enough sleeve room for them to hang up the hammock.  Hubs thought about having this pouch sewn to the sides for keeping the hammock and also as a side pocket for when the hammock was being used.

Thursday, June 7, 2012

REVIEW & GIVEAWAY : My Memories Suite Digital Scrapbooking Software

Raise your hands if you like scrap booking!!!  2 weeks ago,  Liz from My Memories Suite offered me to host a My Memories Suite Giveaway!
I was very excited as this was my very first official Giveaway!  I was also a bit worried because I was never really computer savvy.  I had been surviving now with the most basic commands on my computer and the net.  Despite all that, I was still having fun.  So, I took this as a challenge for me to upgrade myself and of course in the process use this scrapbook software for my future projects too!

So I thought about what should I immortalise in memory ... of course, my wedding album!!!  It had been 6 amazing roller-coaster years, that I had married my sweetheart. And so, I compiled selected photos that best captured the day, for my review project.
It's just too easy!  I never imagined it to be so much fun.  I totally got so sucked-in with it's default shapes & embellishments!  I was 'garnishing' my album like no tomorrow.  I finished it in 2 hours... well, it took only 10 mins for the software to automate all my photos from a folder into a photo album format.  But, I was spending so much time tweaking and testing out all the other functions!

Saturday, February 11, 2012

The Sketchbook Project 2012

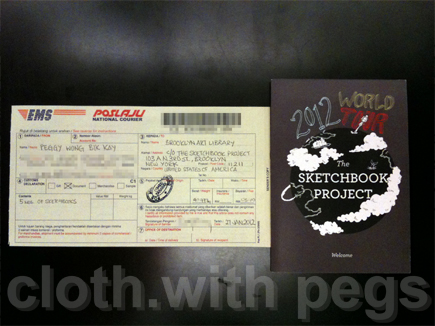
This morning, I received an email from The Art House Librarian Robot (hihi... cute, rite?) that made me so relieved that I can finally blog about this project that we've been working on.
All 5 of us had been on the edge of our seats since we sent out our labour of love.  Now, I could totally comprehend the agony parents had to deal with parting with their children when they go away to venture the world.  And this was what our Sketchbooks were supposed to do ... to go on The Sketchbook Project 2012 World Tour (hopefully) and be on display at the Brooklyn Art Library.
Sketchbook Project 2012 by the Art House Co-op in Brooklyn, NY.  "The Sketchbook Project is a traveling library that archives thousands of artists' sketchbooks from across the globe and shares them with the public. This is where we share all of the incredible work from the shelves." ~http://blog.sketchbookproject.com/

I signed up for the theme "Life Underground" and toyed around with a couple of ideas on how to express myself through the theme on the sketchbook.

Sharing My Passion

Last December, PC published a feature interview with me on her blog, about my love for crafting.  So glad to share this passion with other fellow crafters.  This is part of the effort of "Creating Success Around the World" with their blog interview which is published very Wednesday their host from Europe, Australia, North America and PC, herself, from Asia.
Head on over her BLOG ENTRY on my interview! ;)  Be sure to check out her wonderful crafts as well ... and link up to other creative crafters in her circle!

Wednesday, October 5, 2011

Birthday Special: World Architecture & Habitat Day

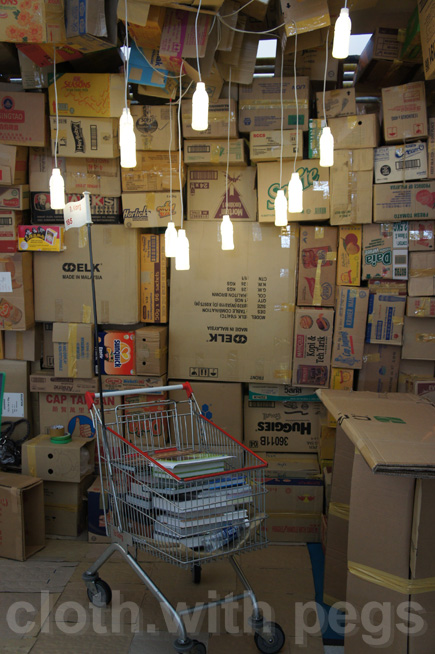
This year's first Monday of October for World Architecture Day & World Habitat Day, coincided with my birthday.  Combining both my loves, architecture & crafting (with recycling), I did my part in contributing to the public installation of 'Cardboard City' at The Spring shopping mall.  Essentially, it highlighted that basic shelter is every human's right.  Min's entry on the project here.

Wednesday, September 14, 2011

Tribal Princess

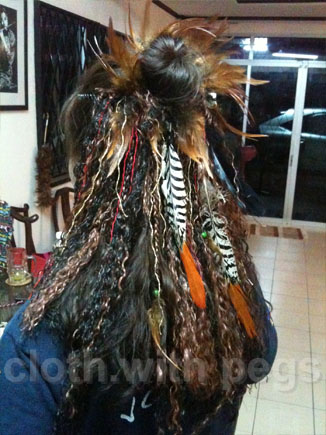
I enjoy doing costumes and what more to help a friend.  Irene was to make her own hair accessories for her tribal belly dance costume.  And, I quickly jumped at the chance to help put this together.
Irene showed me some pictures of how her hair piece was supposed to look like.  And with those crafting stuff she bought, we were soon on the way ...

Friday, November 12, 2010

What's In Your Bag?

Finally, after much procrastinating, I submitted my entry for "What's in your bag?" competition @ Kinokuniya Singapore and Malaysia.

Had lotsa fun with friends putting the shoot together. Thanks, Lili, WanHow & Celine ;)

This is my entry ...
Recognise some of the hand-crafted goodness there??


Sunday, September 26, 2010

Flower Power : Rose

I only know that roses have lots of petals. And, based on that I made small petals and stringed them together for this last 'flower' I had to help make.

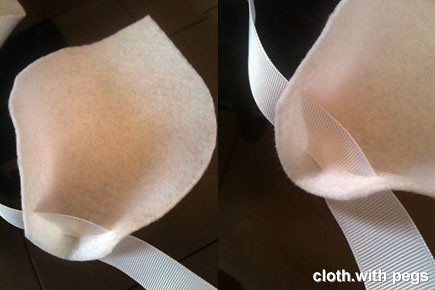
Each petals with 2 rounded corners were approximately of 9x15cm of pink felt. I repeated for ... erm, I don't remember how many times, but a lot of times. To string them together, I laid them to overlap at the last slit opening.
And, stringed them together with grosgrain ribbon. I didn't managed to get it in pink at the last minute, so I just used cream color.
Now, when I first put it on (before I spread out the petals until my chin), I thought it looked really funny, so I took a photo to show you. And, after all the petals were slowly spread downwards towards my chin ... I still look ridiculous ... and another funny picture to show you.
The leaf was simple. A piece of green felt cut to shape, with 2 bands on the reverse side, and fitted onto the fingers and wrist.

For the others, which I did not document the process, I will just post the pictures of the children wearing it ... when the photos are ready. I am quite sure, they will look better than me modelling it. ;)

Flower Power : Hibiscus

I literally just made a big red flower, as directly translated from the chinese name for Hibiscus 'ta hung hua' (big red flower). So, I did not make the stigma any hibiscus should have ... lazy & in a rush.

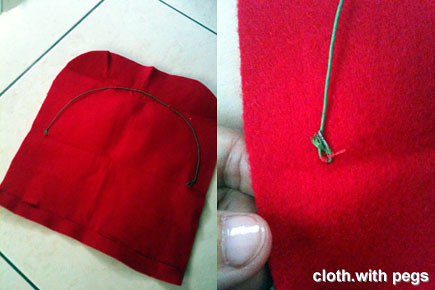
Since all the pieces of red felt we bought were already cut into sizes of approximately 1'x1', I just rounded of 2 corners and added wires offset from those edges, by sewing it in place.
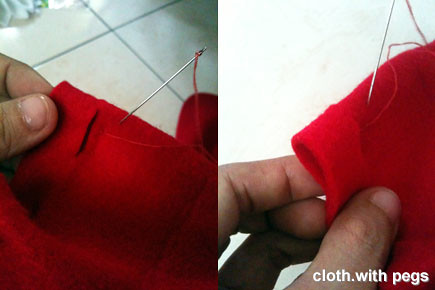
With the 6 slits (for the grosgrain ribbon) I cut across the opposite edge, I stitched 2 slits together lightly to hold the fold, forming sets of 3...
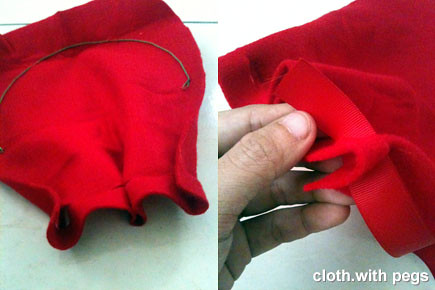
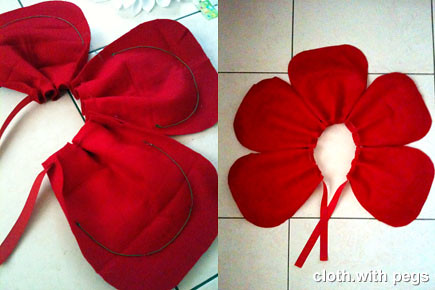
... like so. The previous steps were repeated for the other 4 petals and all 4 were stringed through with red grosgrain ribbon.
Thus, the reverse side and the right side up.

Thursday, September 23, 2010

Animal Farm : Goat

From the previous post on jasmine flower, this one shall be on an animal ... a goat. I initially made a pair of horns from brown cardboard with some paint-shading on it. But, apparently these props for kids have to be hardy enough, as kids can be quite destructive. So not surprisingly, the cardboard horns did not survive the 1st rehearsal.
Therefore, I made another one from felt, and am quite sure this will pass the durability test. I also added ears to the second version, thinking that it compliments the horns better. The model with the felt horns is Celine Ling, one of the teachers at WuJiaoJi.
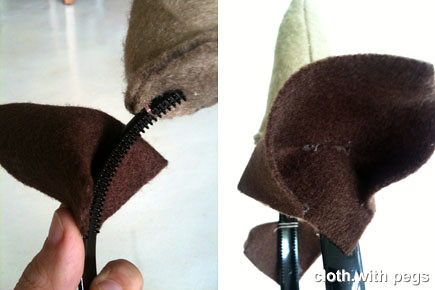
I traced the pattern of the previous flattened cardboard horn (previously of a random sketched pattern) onto 2 pieces of light brown felt . I cut around the traced pattern with some seam allowance and overlaid it over another piece of felt and roughly cut out another 2 pieces. With 4 pieces, I handstitched 2 pieces of brown felt cutouts together, leaving the bottom of the horn-cutouts open. And, repeat for the other 2 pieces of brown felt cutouts.
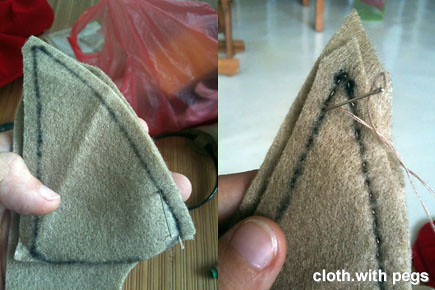
I trimmed off the excess seam allowance, and flipped the horn 'right-side' out.
Used a chopstick to push the horn to it's shape. With all the bits & pieces left over from crafting the other props, I cut them into smaller pieces and stuffed them into the horn to hold it's shape.
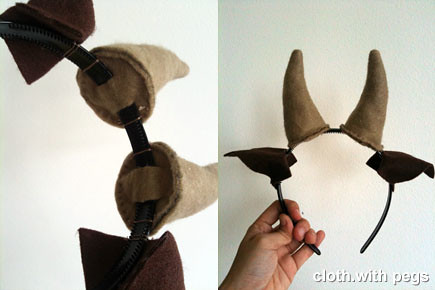
Then, sealing it all in with a round piece, with 2 slits for slipping it into the headband. I glued the horn in place and also handsewn them, to further ensure durability. Repeat, for the other horn.
The ears! I just cut out 2 squares, and folded 2 opposite corners toward another corner. Glued them down like so.
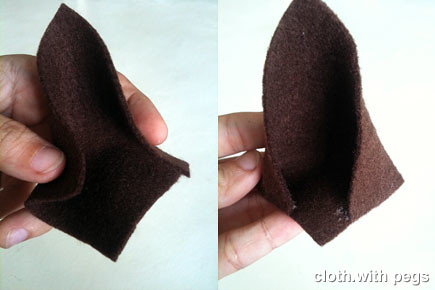
And then, proceed to glue them onto the headband, just under the horn on each side, and also, stitched them in place. To give the horn some shape, I glued the inner fold slightly and stuck it downwards, so the ears will not be pointing upwards, but sideways. Gave it a few tugs here and there to give it some shape too.Done! A view from under the headband ... and the overall view.
Flower Power : Jasmine

Got busily crafty lately for a cause. Friends at WuJiaoJi asked if I would help them with costumes for their children's play. WuJiaoJi (directly translated at 5 Foot-Way) is also known as Talents and Performing Arts Group is a local cultural group that promotes and educate on mainly chinese cultural heritage. They also teaches young children to perform.
So there'll be a series of crafting posts on 'costumes' for their children's play, starting with flowers.
With so many varieties of jasmines, I decided to go with one with delicate petals, because if we stick to those with 5 petals, it would look bulky and not as delicate. So, we bought lots of white felt and cut out the petals pretty much to 1 random pattern I cut out. With one as a template, we produced a lot more until the flower looks full. On the template, note that I cut 2 slits the width of the grosgrain ribbon I am going to string the petals all together with.
After all the petals are stringed together, I hand stitched the sides of the petals together so the flower will hold it's shape, without the petals falling forward or backwards.
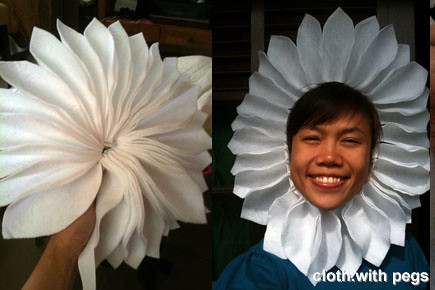
When it's done, it can be easily stored with all the petals folded together. When you put it on, tie the ribbon at the chin ... and slowly fan out the petals towards the sides, and down to cover the ribbon at the chin ... like so ...
Happy flower!

Wednesday, February 10, 2010

CrafteRafter

CrafteRafter is made up of three friends who want to do something that's different from their day jobs. Everyone bring different skills to the table - creativity, business sense, and sewing-fu. And everyone agrees that there are too many things in the world going to waste when it can be given a new lease of life. CrafteRafter combines saving the world with saving time and space in your life. And the cheerleader too, if we really have to. Each item is handcrafted and unique. This is how people typically describe things that are not spat off the end of a factory production line looking exactly like the last item and the next. Call it "character" or "wabi-sabi". Call it "handmade".
My task was simple ... make labels ... handmade labels.

The first batch of labels, were printed on polka dot ribbons. They were funky and I loved them 97%. That 3% was because, the transfer didn't quite stay on the 'dots'.

And since there had been a lot of questions about how these labels were made and requests for how-tos from friends, I am going to share this simple skill on this post. I have been doing this kind of transfers since college days, but I can't recall where I learnt it from.

Note that the mirrored photocopy for the transfer must be from a carbon photocopier (not laser copier). This will be stating the obvious, but in case you didn't know, it is mirrored so that when transfered, it will be 'correct'.

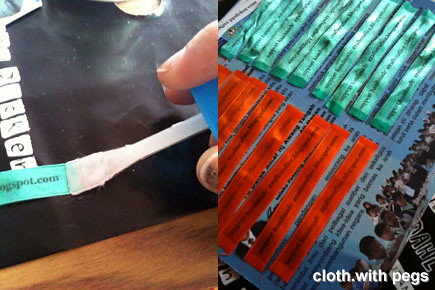
For this purpose, I cut them up in strips for transferring onto the ribbons.
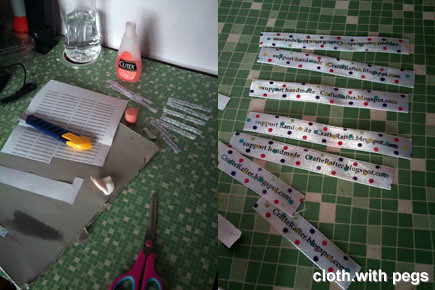
The medium for activating the transfer can be either turpentine, thinner or even nail polish remover. (btw, I clumsily slammed the car door on my right thumbnail last October) Facing the transfer downwards, I pressed the cotton pad previously soaked with thinner on the reverse side.

Tip: Do not drenched the cotton pad in thinner. Somehow, it works better when the cotton pad is lightly soaked. Test it out on spare fabric first.
Hold the transfer paper firmly in place so that the transfered image/text is as sharp as it should be. Slowly remove the transfer paper after.
When I completed printing onto the whole strip of ribbon, I cut them up into label sizes.
Glue was applied at the end of the label strips to prevent fraying and left to dry.
So, this was how our CrafteRafter labels were made. At this moment, there is only the 'Bagget'. Check it out!

By the way, this method works for other material surfaces too. Have fun testing it out!

Wednesday, April 8, 2009

Mysterious

Borneo Boy asked me to make him a mask for our PAMSC BTS Gala Dinner.

What are the chances one would get to pressed aluminum foil up on the face of the president of an architect's association at a charity auction dinner with lots of who's-who?

Sure! Why not ...

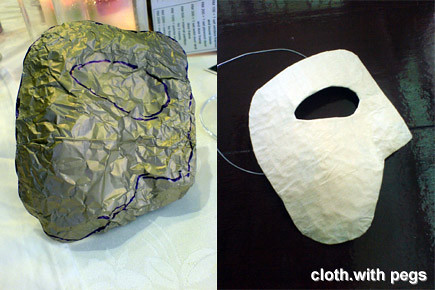
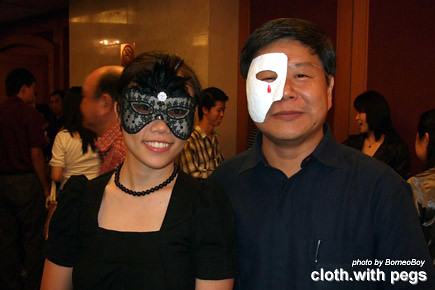
At the Habitat for Humanity charity dinner, I traced and contoured the profile of CW's face with an aluminum foil & marker pen that I brought from home. Forgot to get someone to take a photo of me doing it in the middle of the dinner. But this is the photo of the aluminum foil (after) on the the dining table; and after I applied on the strips of masking tape.To hold CW's mask in place, I tied in the transparent rubber band I used for beading, on both sides of the mask. And here's the both of us. CW sprayed finished the mask with white and added the tear himself after I handed him the mask. That's some DIY effort there!Now, either my nose is not in the middle of my face, or the mask is not centered.

Wednesday, November 26, 2008

Capt Cyke : Badge of Office

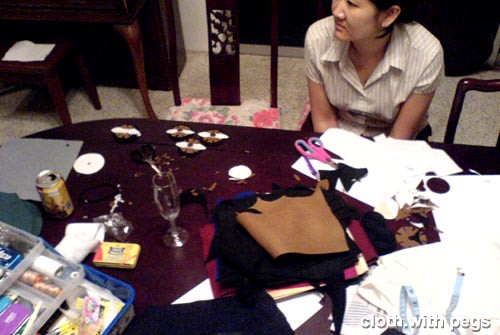
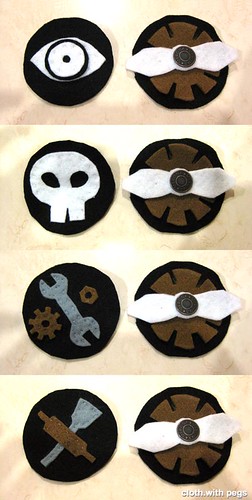
As the crew of an airship, Georgette made us Badge of Office! This post is a tribute to the badges she (and some of us) made, since she hadn't posted anything about it. Below is G adding the final touches at my place.
Some of them were done at Maggie's, with Aline.
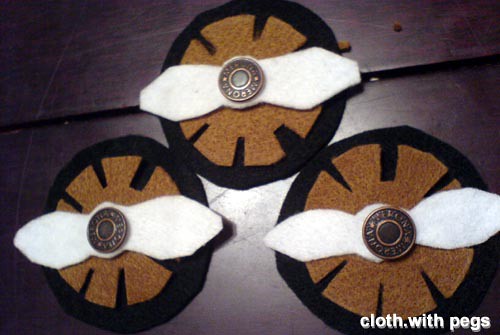
Badges of The Argos.
top-bottom: The Captain, The Doctor, The Machinist & The CookI thought they were absolutely amazing, so I decided to wear it to work today! and when asked, I just said "My friend made it for me" :)

Monday, November 3, 2008

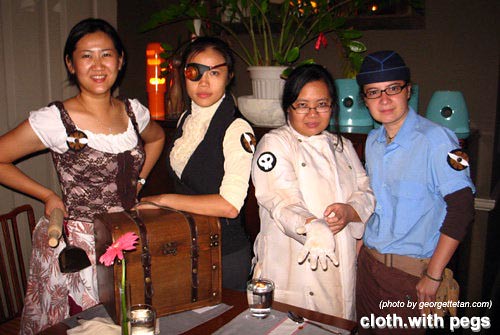
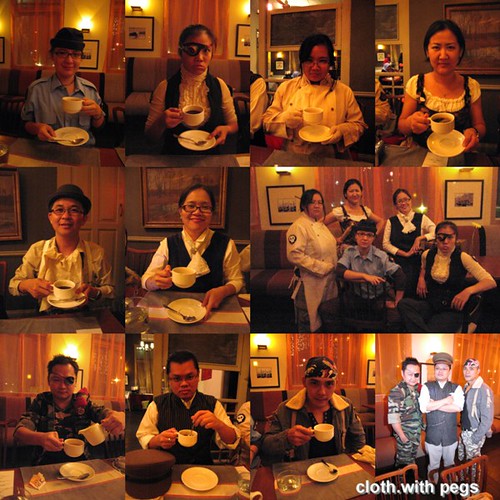
Capt Cyke : Entourage on board The Argos

top (l-r) : Crew of The Argos -
Lucky Liz ; Capt Cyke ; Dr C J Morta ; Aline Cook

middle (l-r) : Cartographers -
Sir Mylo Worthington ; Ms Julia Phillips

bottom (l-r) : Mercenaries -
Kelvinus 'Blue' Pfizer ; The General ; Ual Nala The Mysterious

(I made up some of the names as I go along ... :P)

other links:
Georgette Tan

Monday, September 22, 2008

A Different Kind of Fabric

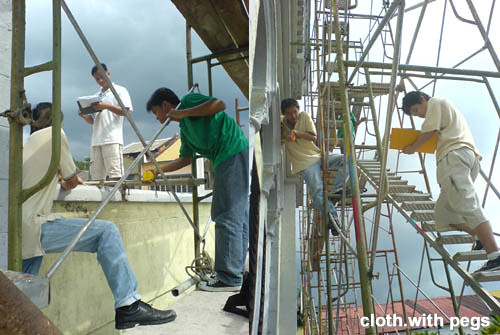
Recently I have been involve in a different type of Weekend Project, not of cloth, but of a different kind of fabric. This is the first time I write about something other that my craft hobby. This is related more to my mainstream work, which I do take passion in that I decide to share it.
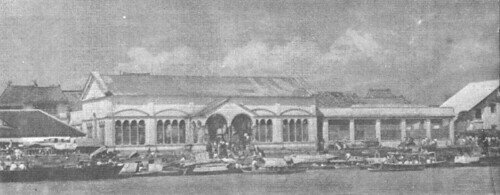
In hopes of preserving the existing fabric, we did measured drawings and documentation of the existing structures along the Old Markets along Gambier Street. Education and Awareness (plus nostalgic sentiments, we hope) will save these remnants of Old Kuching waterfront. At least, I will be able to tell our next generation of what our heritage was, through our documentations.
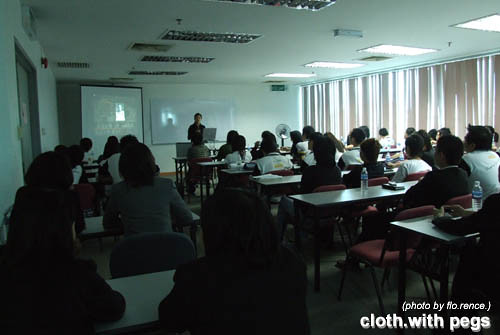
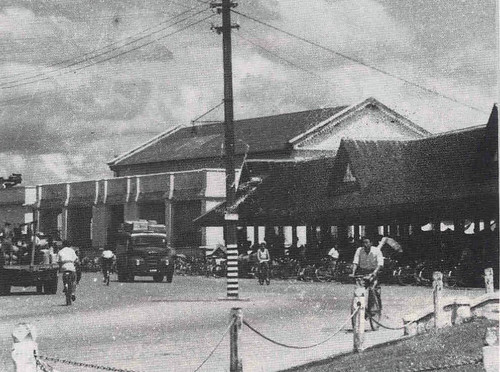
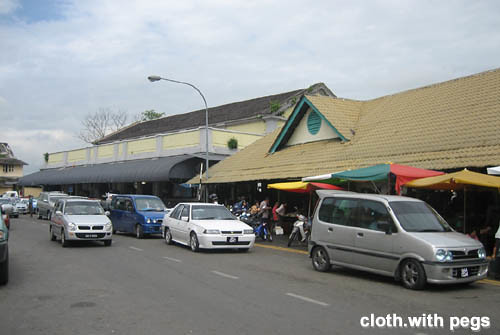
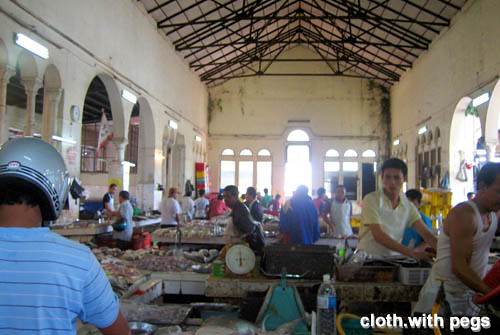
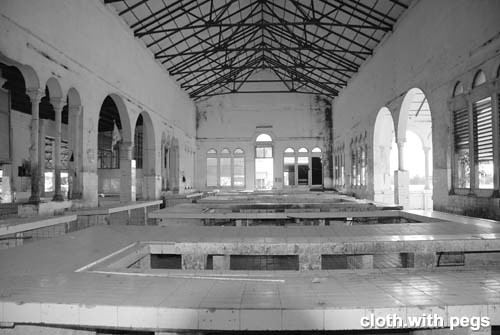
I actually found myself enjoying the talks and walks, I gave to young people; getting them to identify old buildings and monuments. Telling them about the hey-days and those handed-down stories. I realised that kids this generation knows nothing about old Kuching buildings. So, if we don't start being conscious about our culture and heritage, soon, our history and heritage will be just stuffs of myths and legends.Now, a walk down memory lane and the current state.
The Old Fish Market & Vegetable Market at Gambier StreetInterior of The Old Fish Market (before, full of life)Interior of The Old Fish Market (abandoned and left to rot)Interior of The Vegetable Markets (before, full of life)
Interior of The Vegetable Markets (abandoned and left to rot)