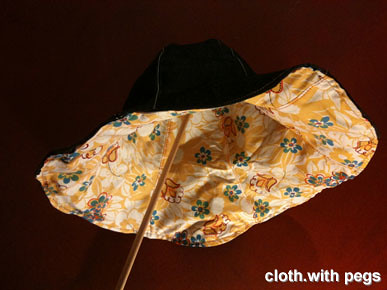
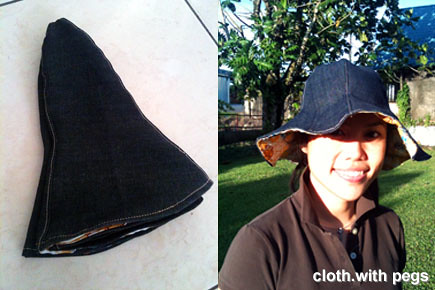
After the previous jeans bag project, I was already packing up my sewing corner, until I stumble upon a sewing magazine and got distracted. Browsing through the magazine, I was fascinated with the idea of having my own hand-made hat to travel with, plus it had quite easy and straight-forward instructions. So I unraveled my sewing gears and was on my way to a new hat. I ransacked around for fabric and decided on the leftover from my 'obi-belt' project and also loose scraps of denims that I had saved. There was only 1 pattern cut-out, to be reproduced in 6 panels for the insides and 6 again for the outside. Since this was supposed to be a reversible hat, both sides had to be neatly constructed. Well, I tried my best. It was so easy, I completed it in less than 1 hour. Tried another photo of the hat with uplighting from my bedside table lamp, for a better illustration of the fabric on the inside. There, the collapsible (easy for packing) and reversible hat. I tried it outdoors. The pattern came from the Spring Edition 2009 vol.30 of Cotton Friend (Japanese sewing/craft magazine)
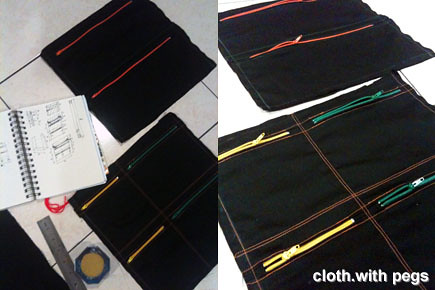
I've always found it rather difficult to fit everything in my travelling slingbag. Being rather disorganised, I am always digging for things in my bag like it was a lucky draw. What I really need is a bag with lotsa pockets inside; different sized pockets for different items, and better still, if they all had zippers, for when I need to seal them up. Gette even suggested bear traps, I guess the zippers comes close.
Started out planning the inside layout of the pockets, which was the primary driving reason for this bag, anyways. Not quite the genius with sewing pockets, so I slapped 2 layers of fabric together and divided up the spaces by sewing it through according to the length of the zippers, like so ...I was going to use fabrics I had saved up from previous projects but I finally decided on using a really old pair of jeans I dug out from de-cluttering my wardrobe. I was on the roll, and forgot about documenting the process, so no how-to pictures. But, it's just lining up the interior of a jeans bag, just like that project I did 2 years back, with an inside full of pockets with zippers.
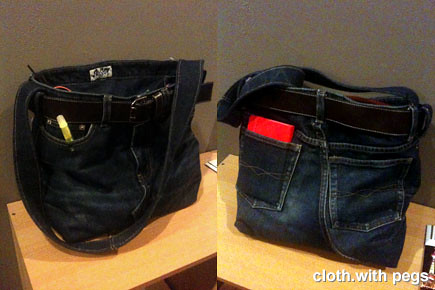
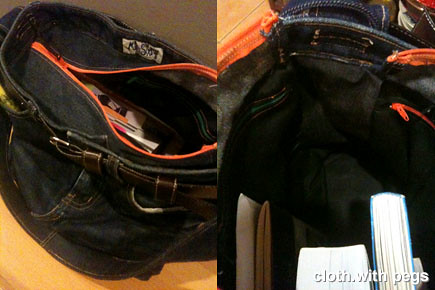
Recycling that old pair of jeans, proved ideal, because of those pockets it already has on the outside. With full intentions of filling up my travel with lotsa sketches, I stuck in my new red Moleskine sketchbook, into one of the pockets on the outside. Here's a peek into the inside ... space for books, and water bottle (and umbrella)!!! Now, I'm 99% ready to go away, next month! ;)If you noticed the belt ... yes, those are recycled from the de-cluttering project too. They were supposed to be an alternative strap for one of my sling bags, which now ended up as a decorative trim, while holding up the shape/brim of the bag.
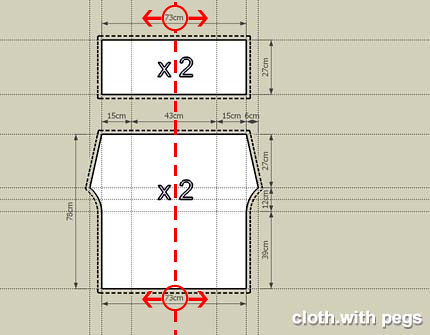
Dear Scott, I have also added a simpler pattern to the wrap pants under the post "Another Wrap Pants".
For bigger waistline, add from the middle outwards, i.e. red markings. A good guide would be to take the measurements from your current pair of wrap pants. 73cm is half of the waistline of my current pair which is 146cm. Therefore, if the waistline of your current pair is 180cm, then extend 73cm to 90cm. As for length, just extend the length of the pants legs, as indicated in blue. If you ended up overestimating the length, you can just hem it higher. You should also try lengthening the 'waistband' piece, i.e. instead of 27cm, try 35cm or even 40cm. You could always just fold them over, if it's too much.
CrafteRafter is made up of three friends who want to do something that's different from their day jobs. Everyone bring different skills to the table - creativity, business sense, and sewing-fu. And everyone agrees that there are too many things in the world going to waste when it can be given a new lease of life. CrafteRafter combines saving the world with saving time and space in your life. And the cheerleader too, if we really have to.Each item is handcrafted and unique. This is how people typically describe things that are not spat off the end of a factory production line looking exactly like the last item and the next. Call it "character" or "wabi-sabi". Call it "handmade". My task was simple ... make labels ... handmade labels.
The first batch of labels, were printed on polka dot ribbons. They were funky and I loved them 97%. That 3% was because, the transfer didn't quite stay on the 'dots'.
And since there had been a lot of questions about how these labels were made and requests for how-tos from friends, I am going to share this simple skill on this post. I have been doing this kind of transfers since college days, but I can't recall where I learnt it from.
Note that the mirrored photocopy for the transfer must be from a carbon photocopier (not laser copier). This will be stating the obvious, but in case you didn't know, it is mirrored so that when transfered, it will be 'correct'.
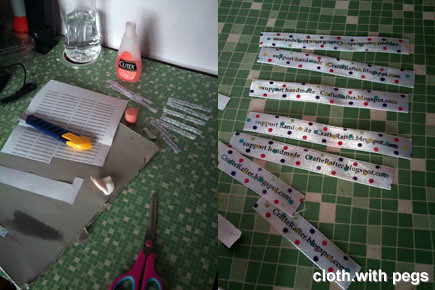
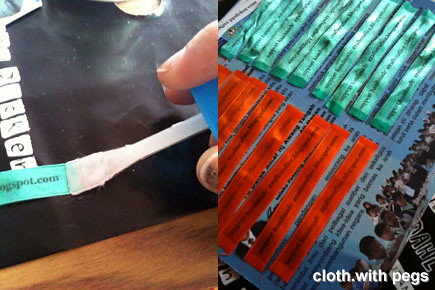
For this purpose, I cut them up in strips for transferring onto the ribbons. The medium for activating the transfer can be either turpentine, thinner or even nail polish remover. (btw, I clumsily slammed the car door on my right thumbnail last October) Facing the transfer downwards, I pressed the cotton pad previously soaked with thinner on the reverse side.
Tip: Do not drenched the cotton pad in thinner. Somehow, it works better when the cotton pad is lightly soaked. Test it out on spare fabric first. Hold the transfer paper firmly in place so that the transfered image/text is as sharp as it should be. Slowly remove the transfer paper after. When I completed printing onto the whole strip of ribbon, I cut them up into label sizes. Glue was applied at the end of the label strips to prevent fraying and left to dry. So, this was how our CrafteRafter labels were made. At this moment, there is only the 'Bagget'. Check it out!
By the way, this method works for other material surfaces too. Have fun testing it out!
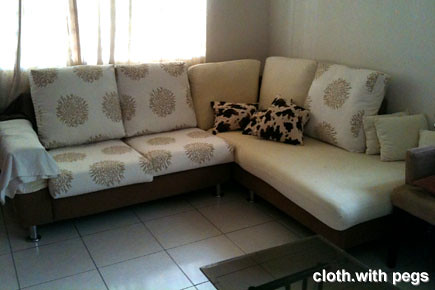
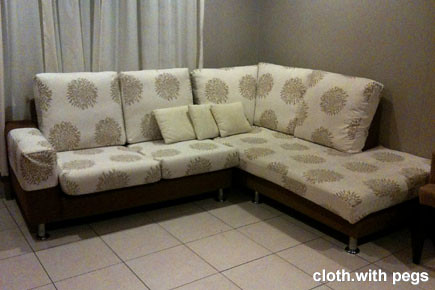
The couch at home is in dire need of a new outfit. The one it came in 5-6 years ago is looking dowdy and blotchy from food stains. So last December, we went fabric hunting and ended up choosing this patterned micro-fibre fabric. Some commented that the patterns looked like chrysanthemum flowers. Bought 10meters of it (60" width).
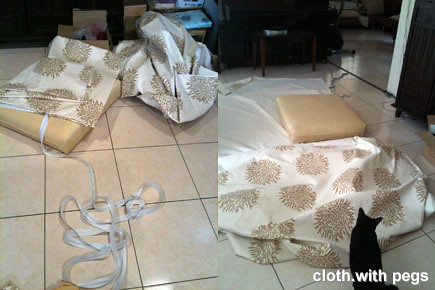
Spread it all out on the floor (biggest workspace ever) and started measuring away from the existing cushions. Recorded the measurements, in the only way I know how to. Categorised & coded the pieces. And started sewing. It was pretty straight forward I must say, for most of the pieces. Panel with zipper, and the rest of the panels. I was so glad that the fabric didn't stretch too much. So it pretty much held its measurements.
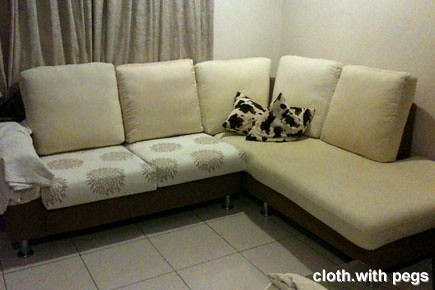
Voila, the 1st new cushion cover ... ... and another one of the same measurements. Next day, 3 more of the same measurements. Over the next couple of days, some more ... and finally ... finished!!! Mmmm ... I love 'swimming' on the finished couch ... smooth micro-fibre surface .... bliss!
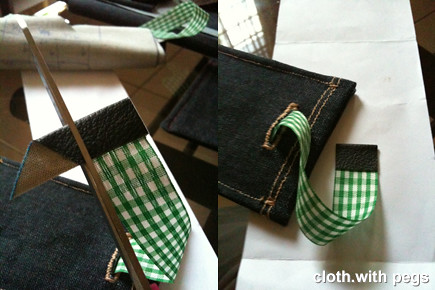
After salivating over the thought of getting a new phone, I finally got myself an iPhone. With all the extra fabric I have, I have made a new phone pouch. Use fabric from part of old t-shirt, some leftover jeans fabric, ribbon and a bit of pvc leather. Most of them were odds & ends that I saved from previous projects.
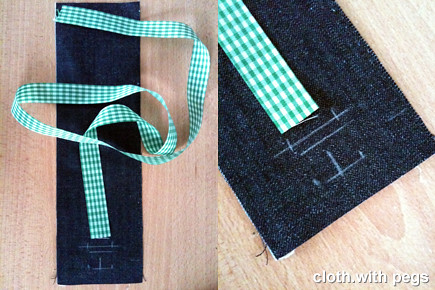
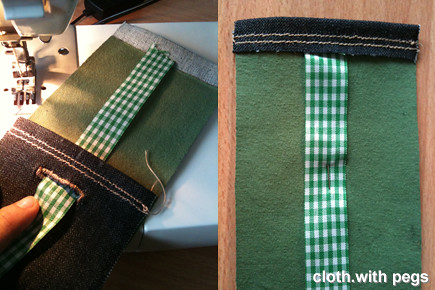
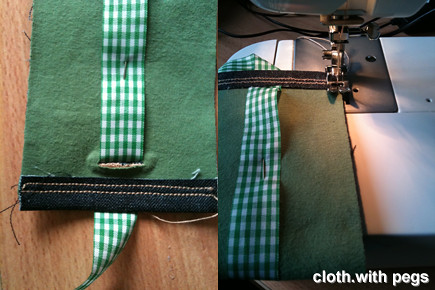
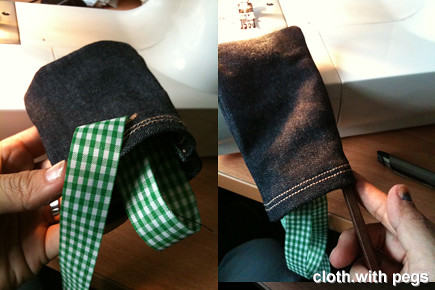
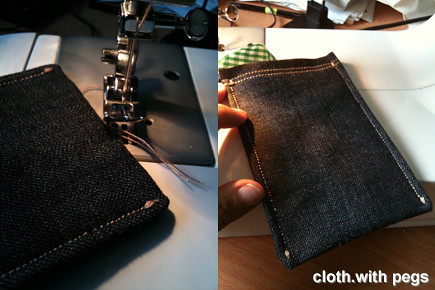
So, I started out with cutting out the outer fabric (jeans) with the template I prepared. (write me if u want the template with dimensions) Then I lightly glued it on the t-shirt material on the inside as lining, leaving about 1" at each end unlined, because I was going to fold it over and I don't need such a thick edge to hem. Before I head over to the sewing machine, I marked in opening I will need for the buttonhole, where I will slide the ribbon through. Now, this ribbon will help me pull/push the phone out of the pouch eventually. I offset the opening from the end of the fabric slightly over 2", in the middle and to the width of the ribbon.Now the sewing. I folded over one of the 1" ends, not lined with the t-shirt fabric, and sewed 2 straight stitch. And proceeded to making the buttonhole. Stringing the ribbon through the buttonhole, I pulled it to the other end, which was not hemmed yet. Folded over the 1" end and sewed 2 straight stitches across with the ribbon inserted in the middle. You may also noticed the pin that held the ribbon in place. I stretched the ribbon along the length of the fabric and pinned it down, all the way from the fixed end to the button hole. Then I halfed it with the insides (t-shirt lining) facing outwards, and sewed straight stitch down both sides.And flipped it inside out, revealing the jeans fabric. I usually use chopsticks to push out the corners. At this point, I sewed straight stitches along both sides, to secure it. I sometimes backstitch at the end of a straight stitch but I prefer sewing over one point using the function that stitches the ends of the buttonhole, because it's much neater. See the detail at below.Since I didn't want the ribbon to stick out too much, I put the phone in all the way which pushed the ribbon all the way to the bottom, just to make sure. And cut off the access just at the rim of the opening. Then, I attached a halfed pvc leather at the end of the ribbon. This will be the finger pull part.I trimmed off the access pvc leather after the adhesive had dried.Finally, completed. Picture of phone pulled out of the pouch; and picture of ribbon when phone is tucked in. I think this is a very simple pouch to make and can be applied to any phone, pda, etc. Simple satisfaction from own handmade goodness!

 I ransacked around for fabric and decided on the leftover from my 'obi-belt' project and also loose scraps of denims that I had saved. There was only 1 pattern cut-out, to be reproduced in 6 panels for the insides and 6 again for the outside. Since this was supposed to be a reversible hat, both sides had to be neatly constructed. Well, I tried my best. It was so easy, I completed it in less than 1 hour.
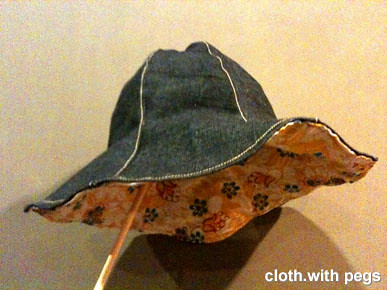 Tried another photo of the hat with uplighting from my bedside table lamp, for a better illustration of the fabric on the inside.
 There, the collapsible (easy for packing) and reversible hat. I tried it outdoors.
 The pattern came from the Spring Edition 2009 vol.30 of Cotton Friend (Japanese sewing/craft magazine)